Customize AMBOSS
for your medical students!
Search, Save and Share with
AMBOSS University Sessions
What are University Sessions?
- Customizable question sessions that can be paired with lectures and conducted as formative assessments.
- Combined with a comprehensive reference tool that supports different types of learners and modern study habits.
- Utilize blended learning methods that reference the latest digital medical knowledge.
- Improve clinical reasoning with thousands of high quality multimedia resources.
- Choose from over 5800 case-based questions from the AMBOSS Question Bank (in 5 difficulty levels), which are linked to the Knowledge Library with over 1200 clinical articles.
How can they support my teaching?
- Assign clinical cases as homework from the AMBOSS Question Bank and implement into your lessons and evaluations.
- Create better analyses and metrics that are tailored to specific student groups, by limiting who can access the sessions with unique sharing links.
- Use smart features like the Qbank, Library, interactive multimedia content, Anki integration, and learning analytics to help students succeed on exam day.
- Leverage performance analysis for learning suggestions and peer group comparisons.
Step 1: Get started
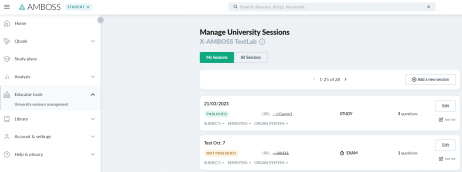
Go to “Educator tools” on the sidebar and choose “University sessions management” to find an overview of all sessions from your university. You can toggle between all the sessions that you’ve created and all shared sessions created within your university. Either search for an existing session or start a new session with the “Add a new session” button.
Step 2: Create a new session
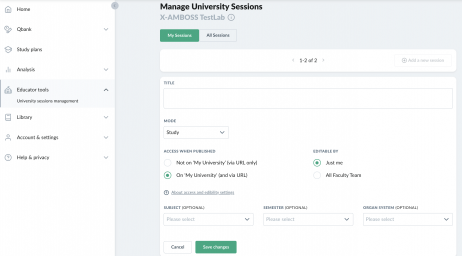
Add a unique title and update the access settings and edit permissions. All settings can be changed at any time. You have the option to include information on the relevant subject, semester, and organ system. Save your changes to create a new session. Please note that sessions can’t be published until they contain questions.
Step 3: Find questions
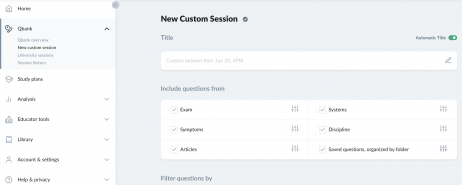
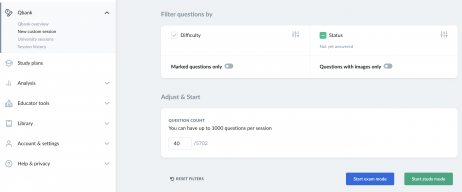
To add questions to your session, open the Qbank tab on your sidebar. Click on “New custom session”. You can filter questions by Exam, Systems, Symptoms, Discipline, and Articles.
Step 4: Add questions
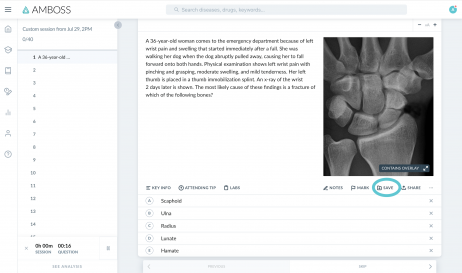
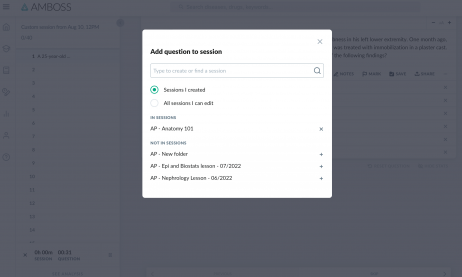
Click the “Save” icon underneath the question. From there, you will have the option to select which of your saved sessions you would like the question to be saved to. Once the question has been saved, it will be moved to the “In Sessions” section.
Step 5: Continue exploring questions via our Knowledge Library
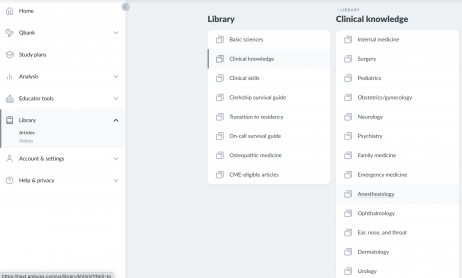
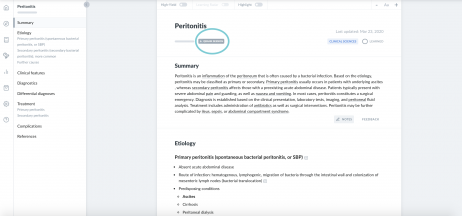
Navigate to an Article of your choice, then select the “Qbank Session” option.
Step 6: Publish your session
Once you’re satisfied with your question collection and ready to publish your session, open the “Educator tools” tab from the sidebar “University sessions management”. There you can find your session in the list or via search. Select your session and change the Status to “Published”, then click “Save changes.”
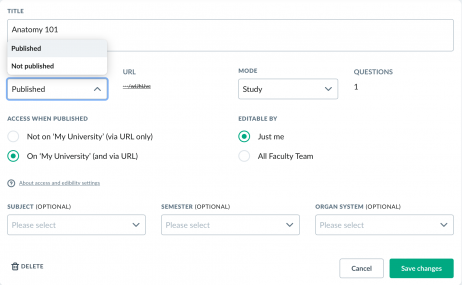
Under the “Access When Published” setting, you can choose whether you want the session to be searchable on the “University sessions” Qbank tab (as shown above) or whether you want it to be available by direct link only.
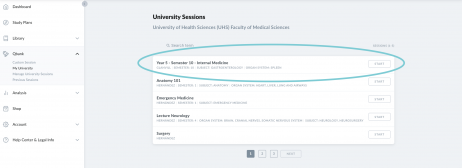
You can now create and share your University Sessions with your students. Happy teaching!
We’re here at hello@amboss.com if you run into problems or have any questions.